Set up a professional email signature the first time you sign in to Webmail. Webmail builds the signature from a few details and adds it automatically to every message you send.
Step 1 — Review the signature setup screen
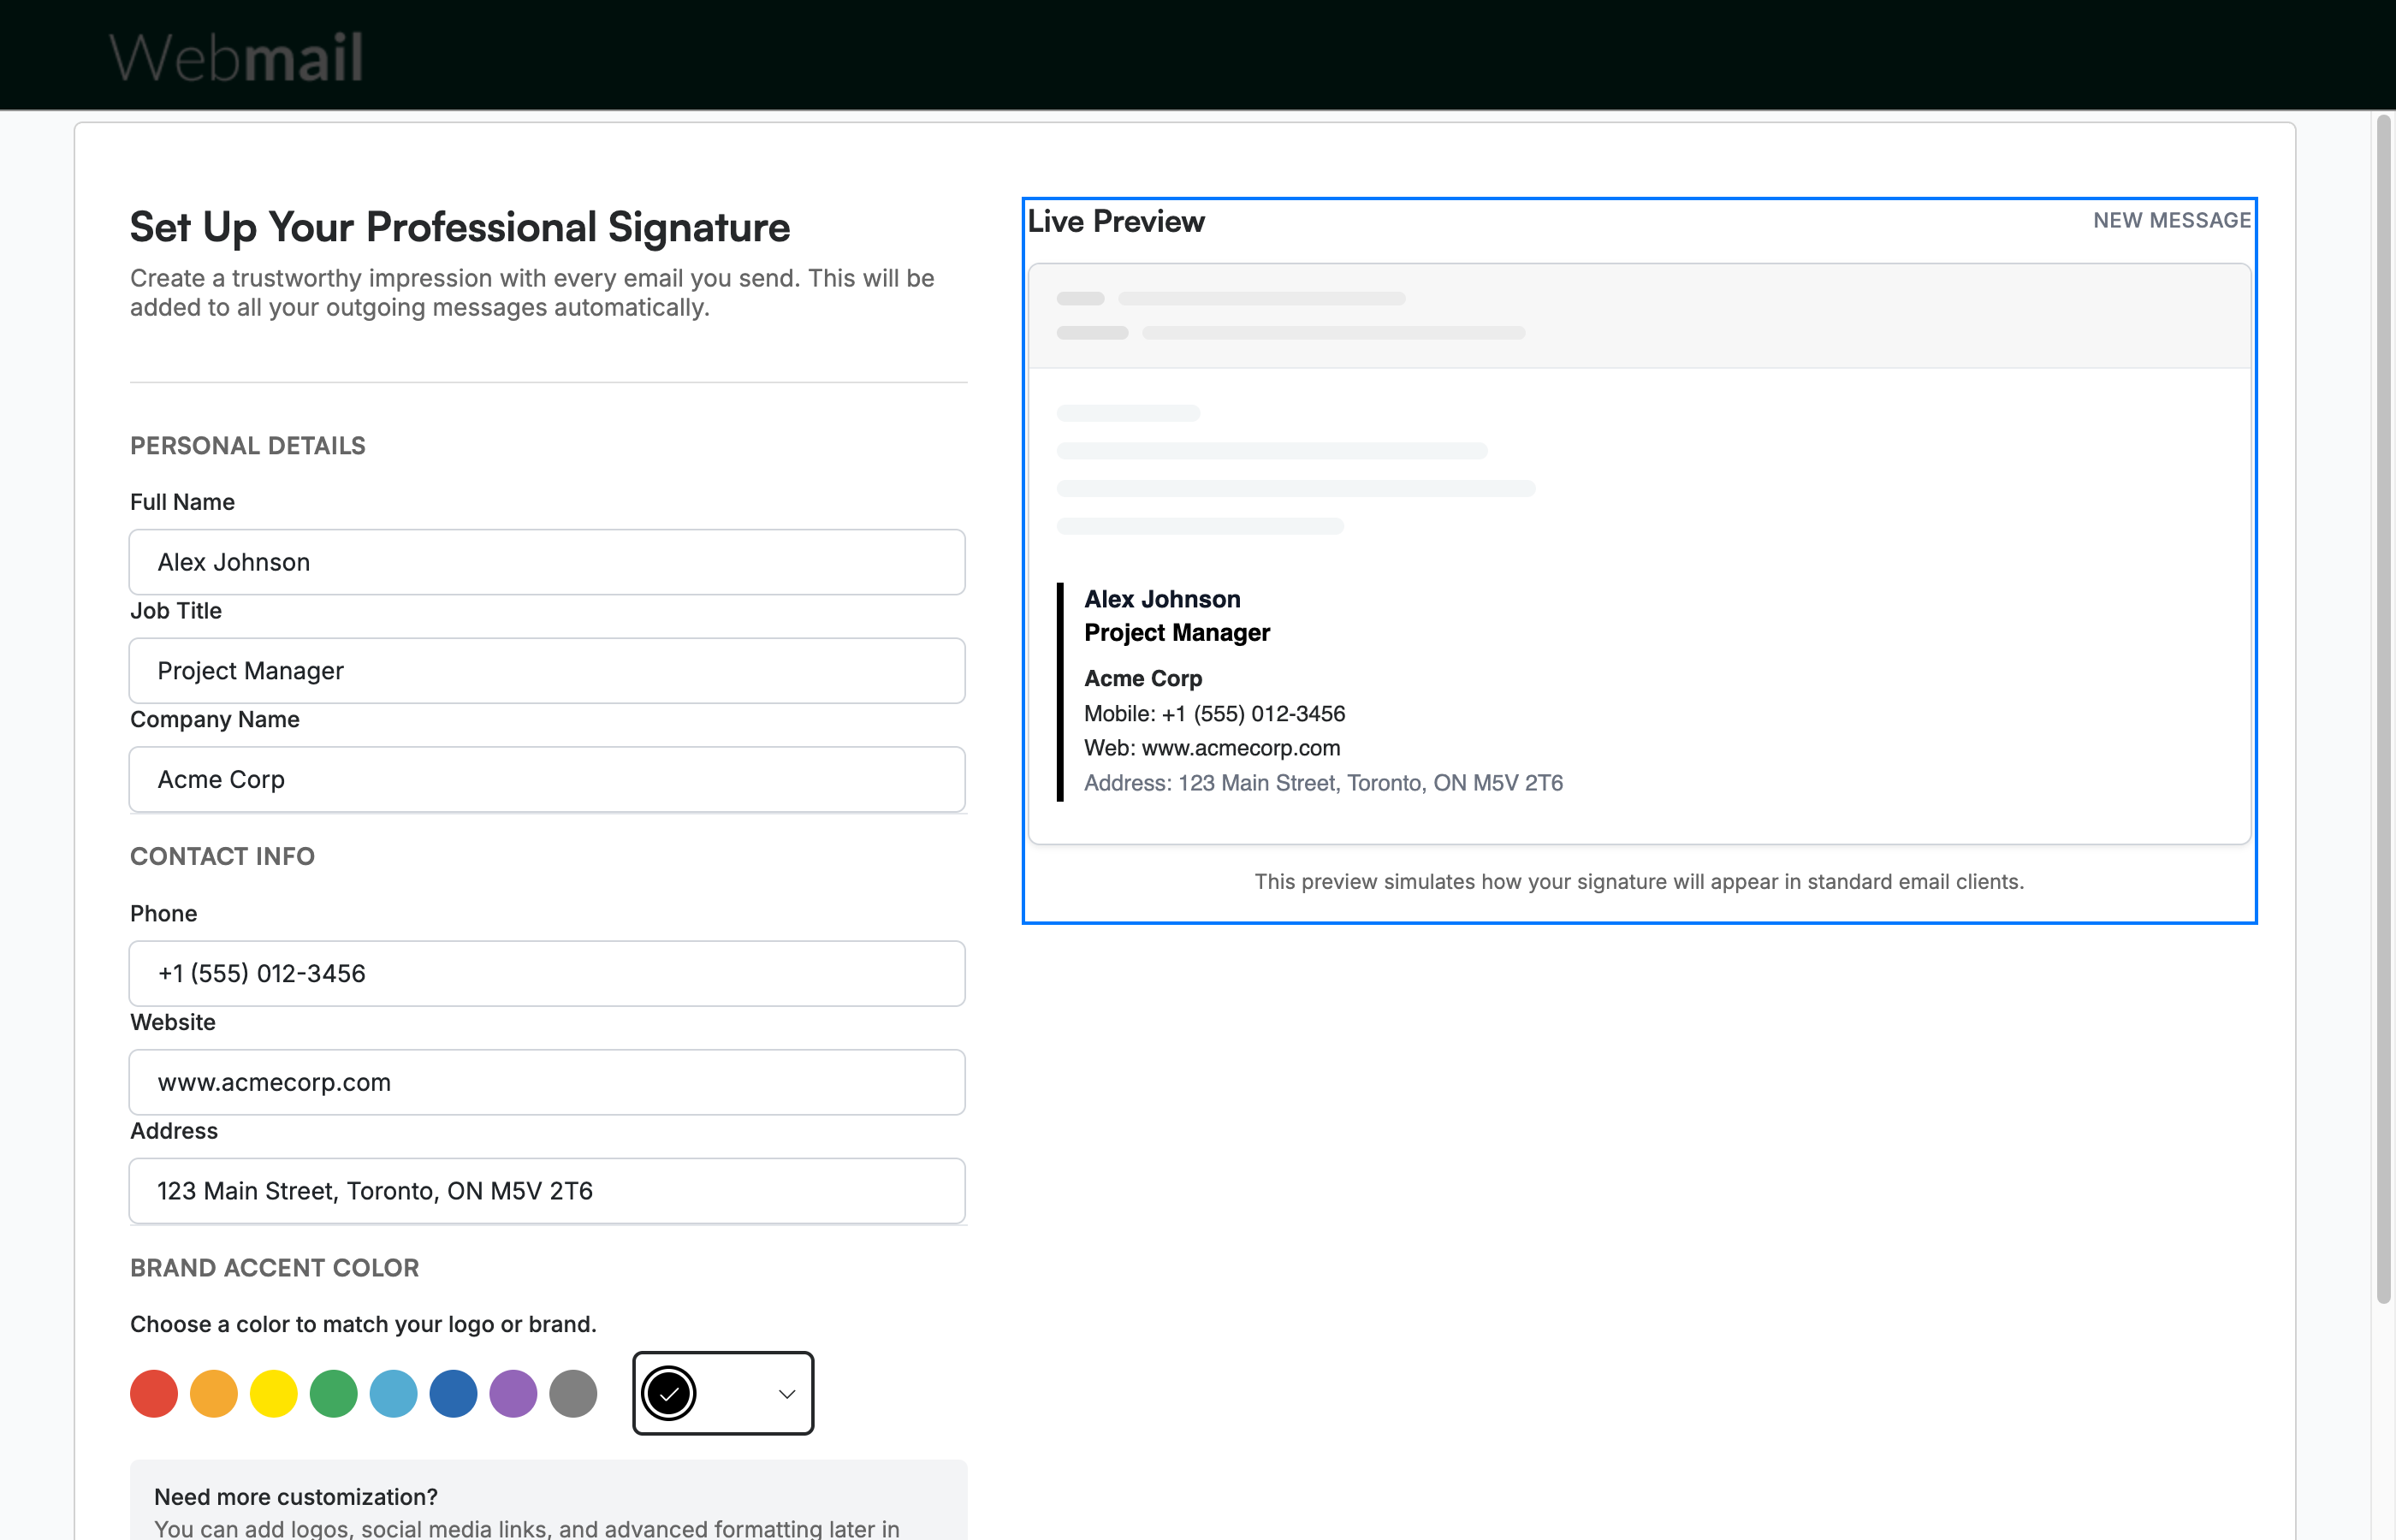
Review the Set Up Your Professional Signature screen, which opens automatically after you create your security question. Fill in the form on the left, and the Live Preview on the right shows how your signature will look and updates as you type.
Tip: You can add logos, social media links, and advanced formatting later in Settings > Preferences.
Step 2 — Enter your personal details
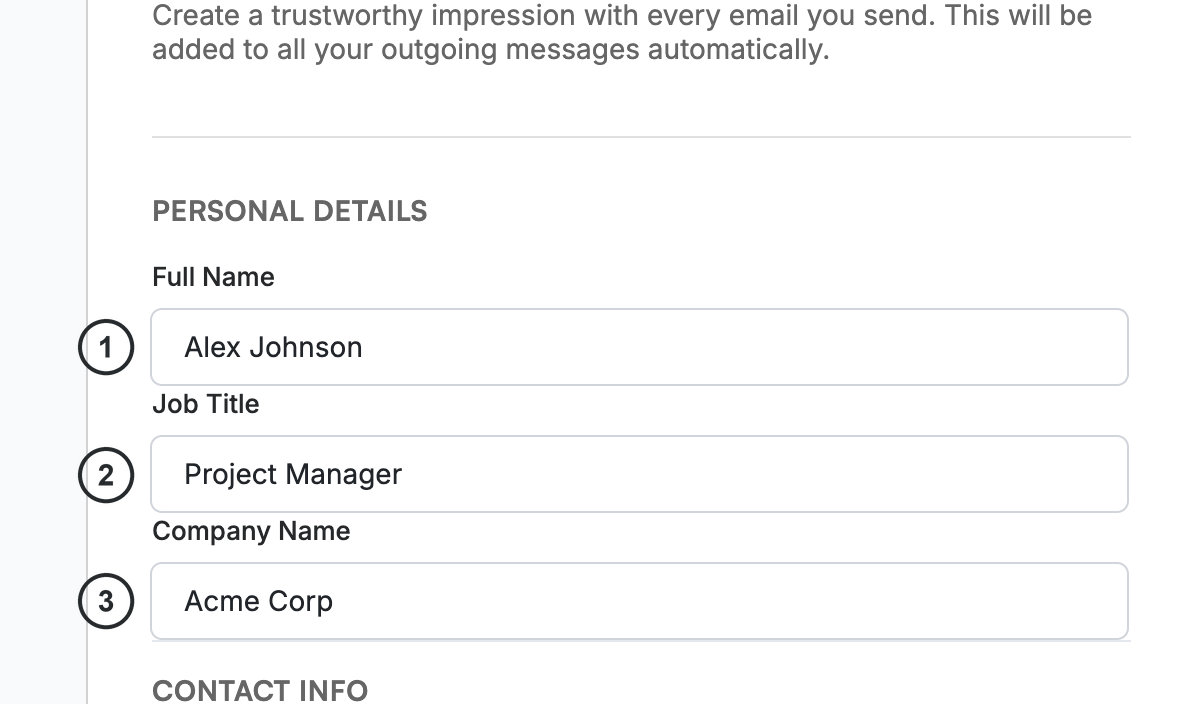
Enter your Full Name ①, Job Title ②, and Company Name ③ in the Personal Details section.
Step 3 — Enter your contact info
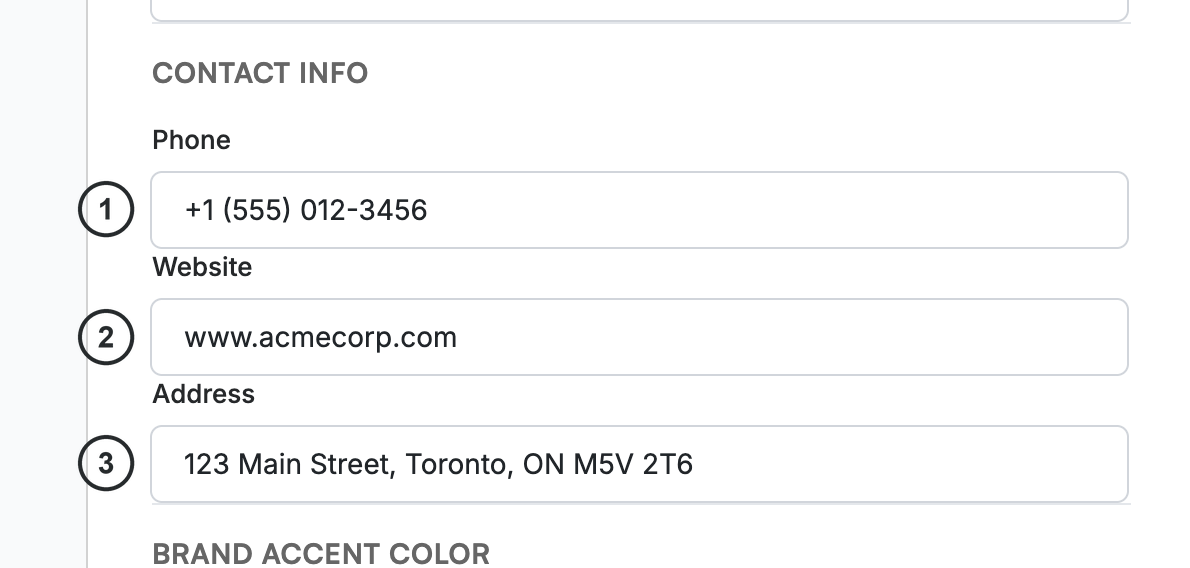
Enter your Phone ①, Website ②, and Address ③ in the Contact Info section.
Step 4 — Select a brand accent color
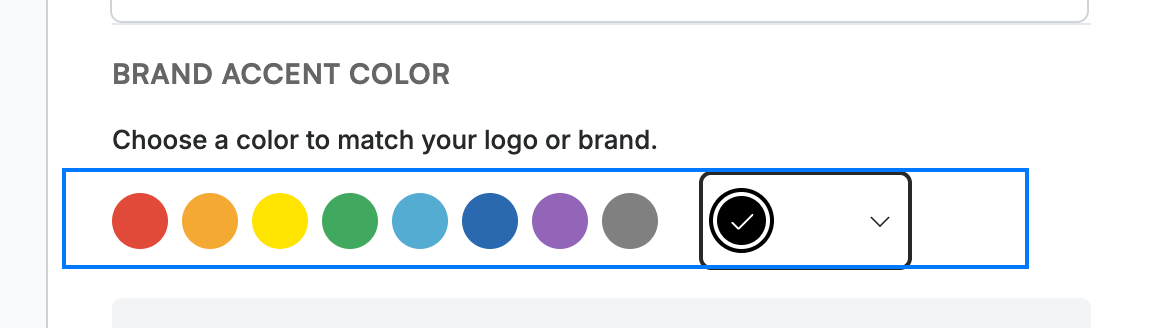
Select a color from the Brand Accent Color palette to match your logo or brand, or use the custom color picker on the right. The accent color is applied to the bar beside your signature in the preview.
Step 5 — Save your signature
Click Save & Go to Inbox to apply your signature and open your inbox. To set it up later instead, click Skip for now.

Explore our other guides to get the most out of Webmail.