When you open Webmail before signing in, a cookie notice appears on the login screen. This guide explains what the notice covers and how to accept, reject, or customise the cookies the site uses.
Step 1 — Where the cookie notice appears
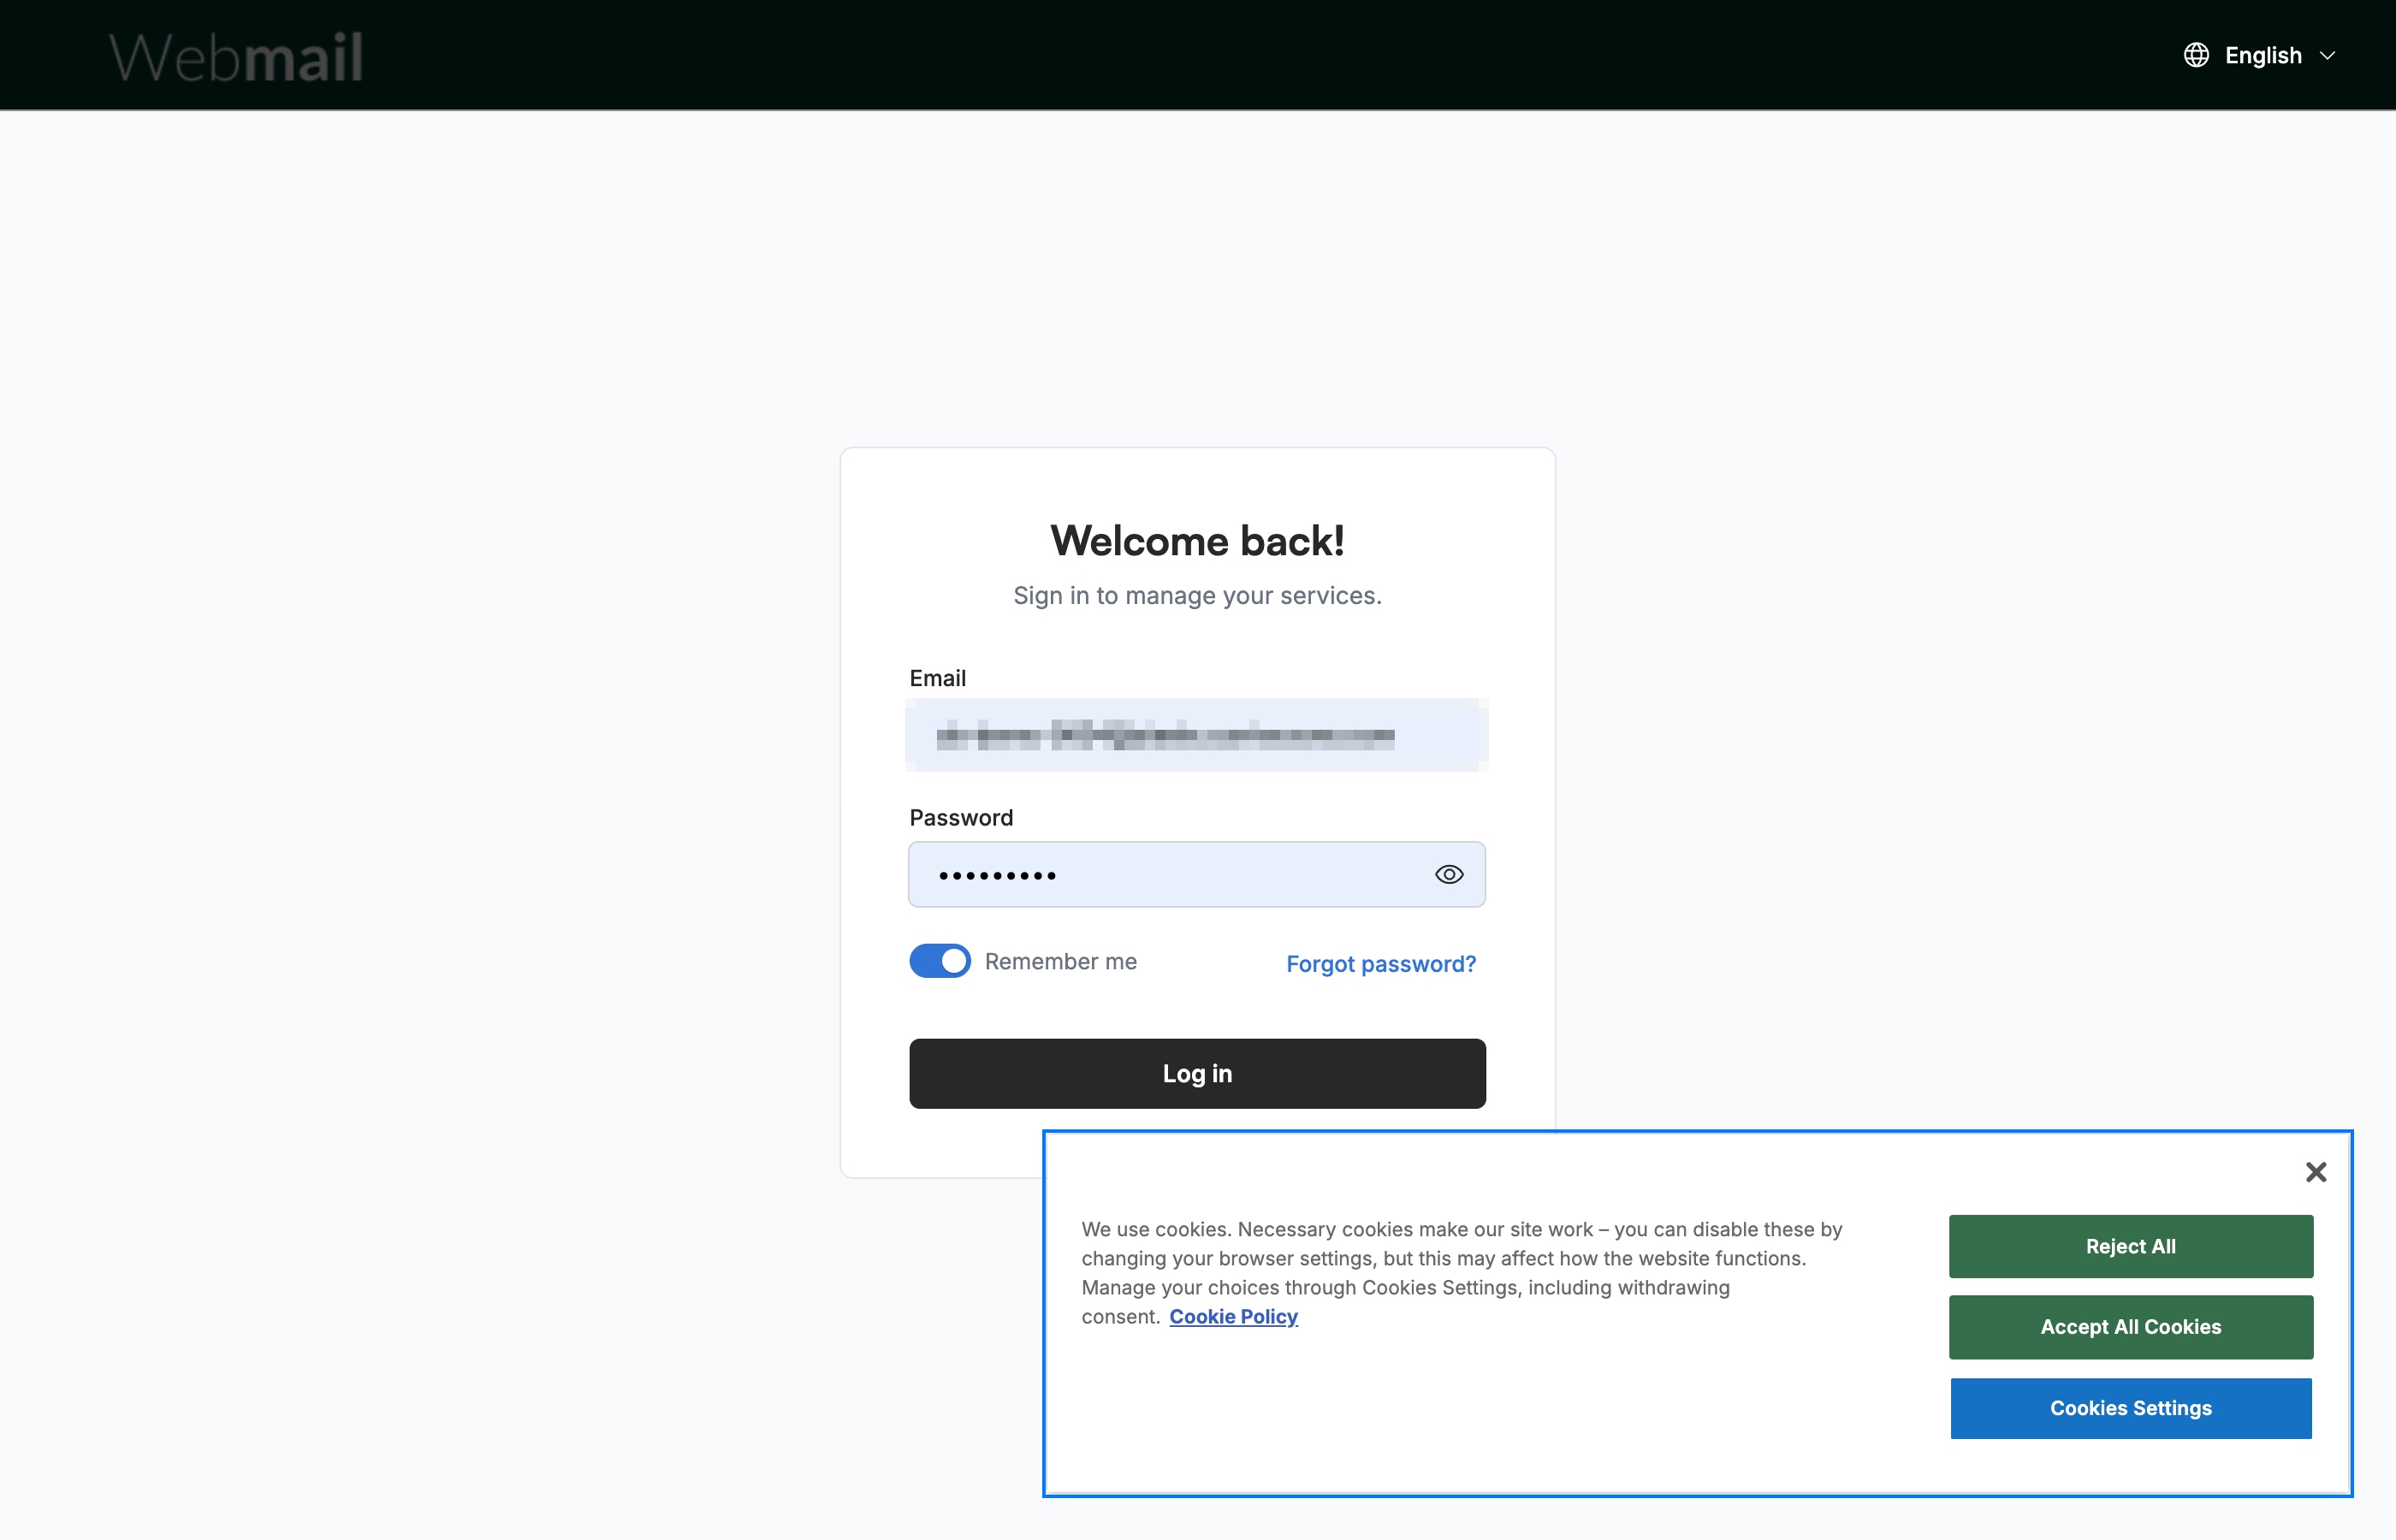
The cookie notice appears in the lower-right corner of the login screen, alongside the sign-in card. It explains that Webmail uses cookies and links to the full Cookie Policy. The notice stays open until you make a choice, so you can still sign in while it is showing.
Step 2 — Your cookie choices
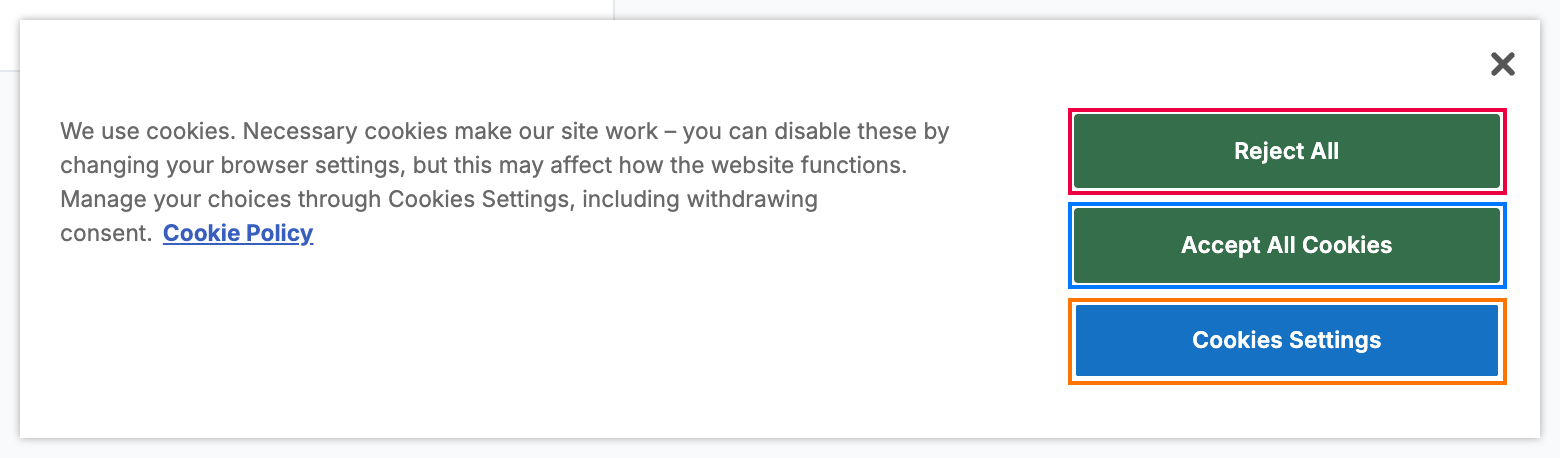
The notice gives you three buttons:
- Reject All (red) — declines all non-essential cookies.
- Accept All Cookies (blue) — allows every cookie category.
- Cookies Settings (orange) — opens the Privacy Preference Center, where you can choose categories individually.
You can also dismiss the notice with the × in the top-right, or read the full policy through the Cookie Policy link.
Note: Strictly necessary cookies keep the site working and cannot be turned off, even if you choose Reject All.
Step 3 — Adjusting your cookie preferences
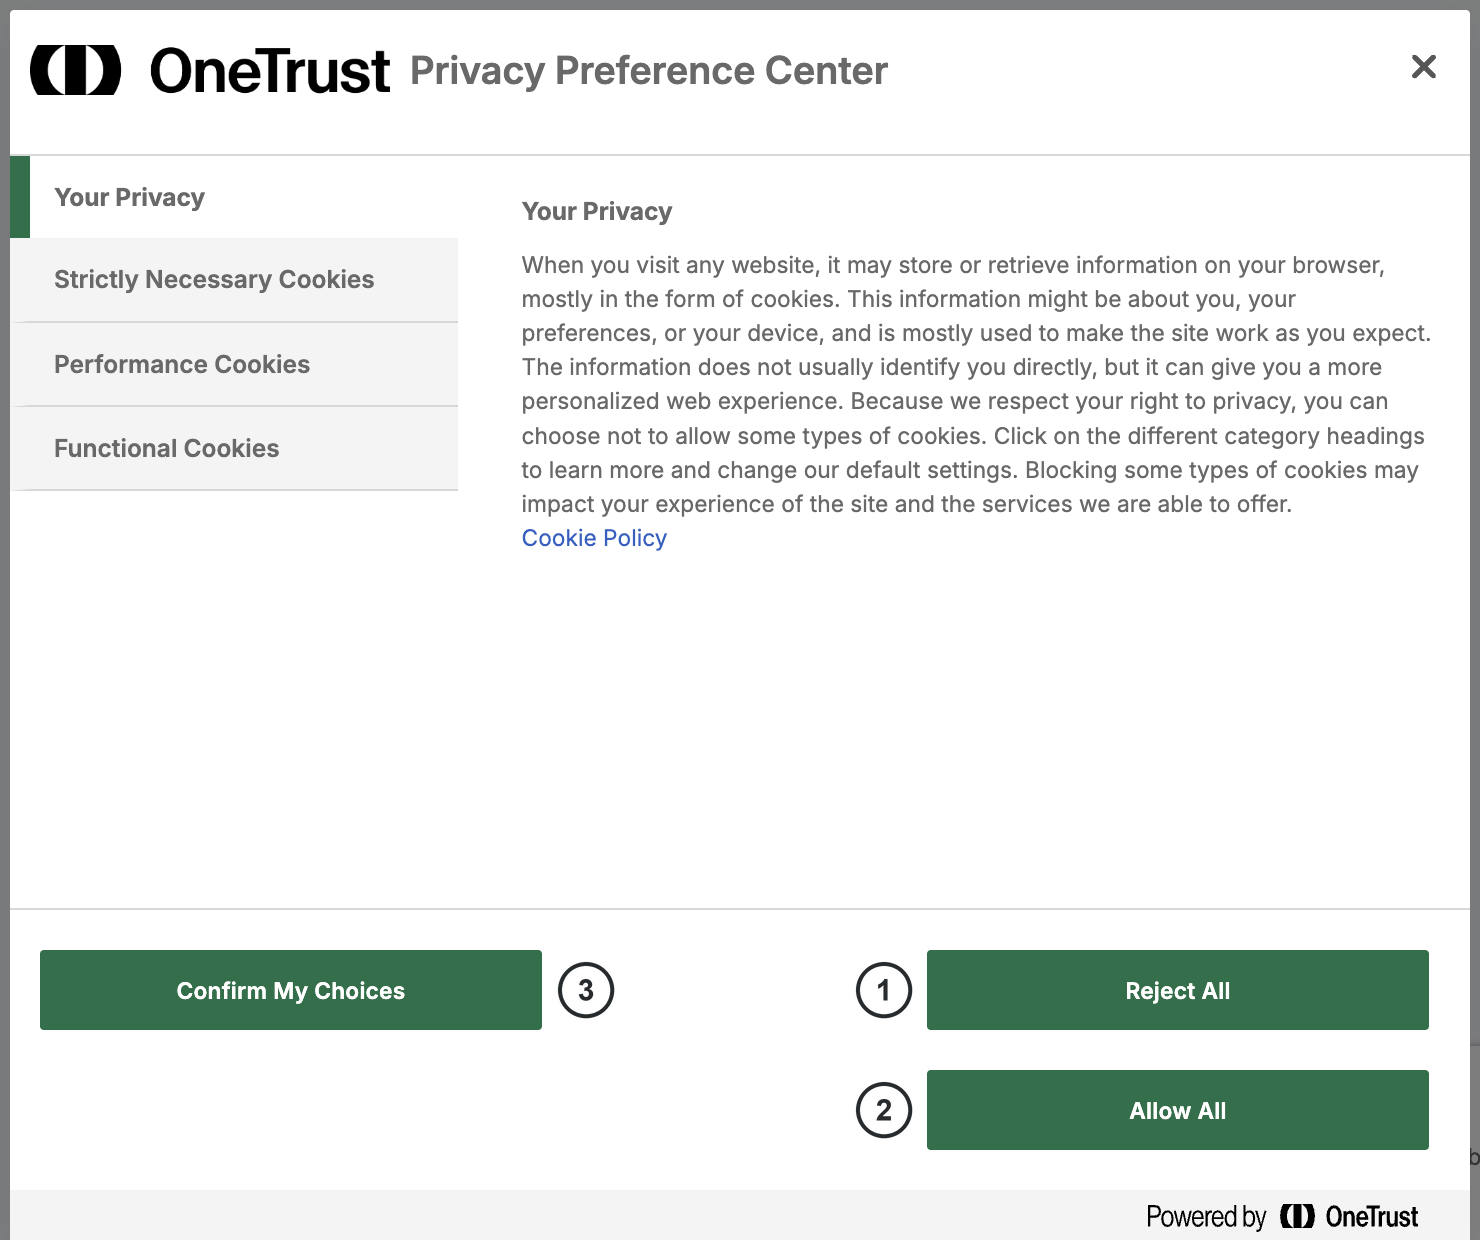
Click Cookies Settings to open the Privacy Preference Center. The left panel lists the cookie categories — Strictly Necessary Cookies, Performance Cookies, and Functional Cookies — and you can open each one to turn its cookies on or off. When you are done, choose one of the buttons along the bottom:
- Reject All ① — declines all optional cookies.
- Allow All ② — enables every category.
- Confirm My Choices ③ — saves the exact selection you have made.
Tip: To change your choices later, reopen the Privacy Preference Center from the floating cookie button that stays on the screen after you make a selection.
Explore our other guides to get the most out of Webmail.