Insert your free time from the calendar directly into a message so the recipient can see when you are available to meet. This guide shows how to add your availability while composing.
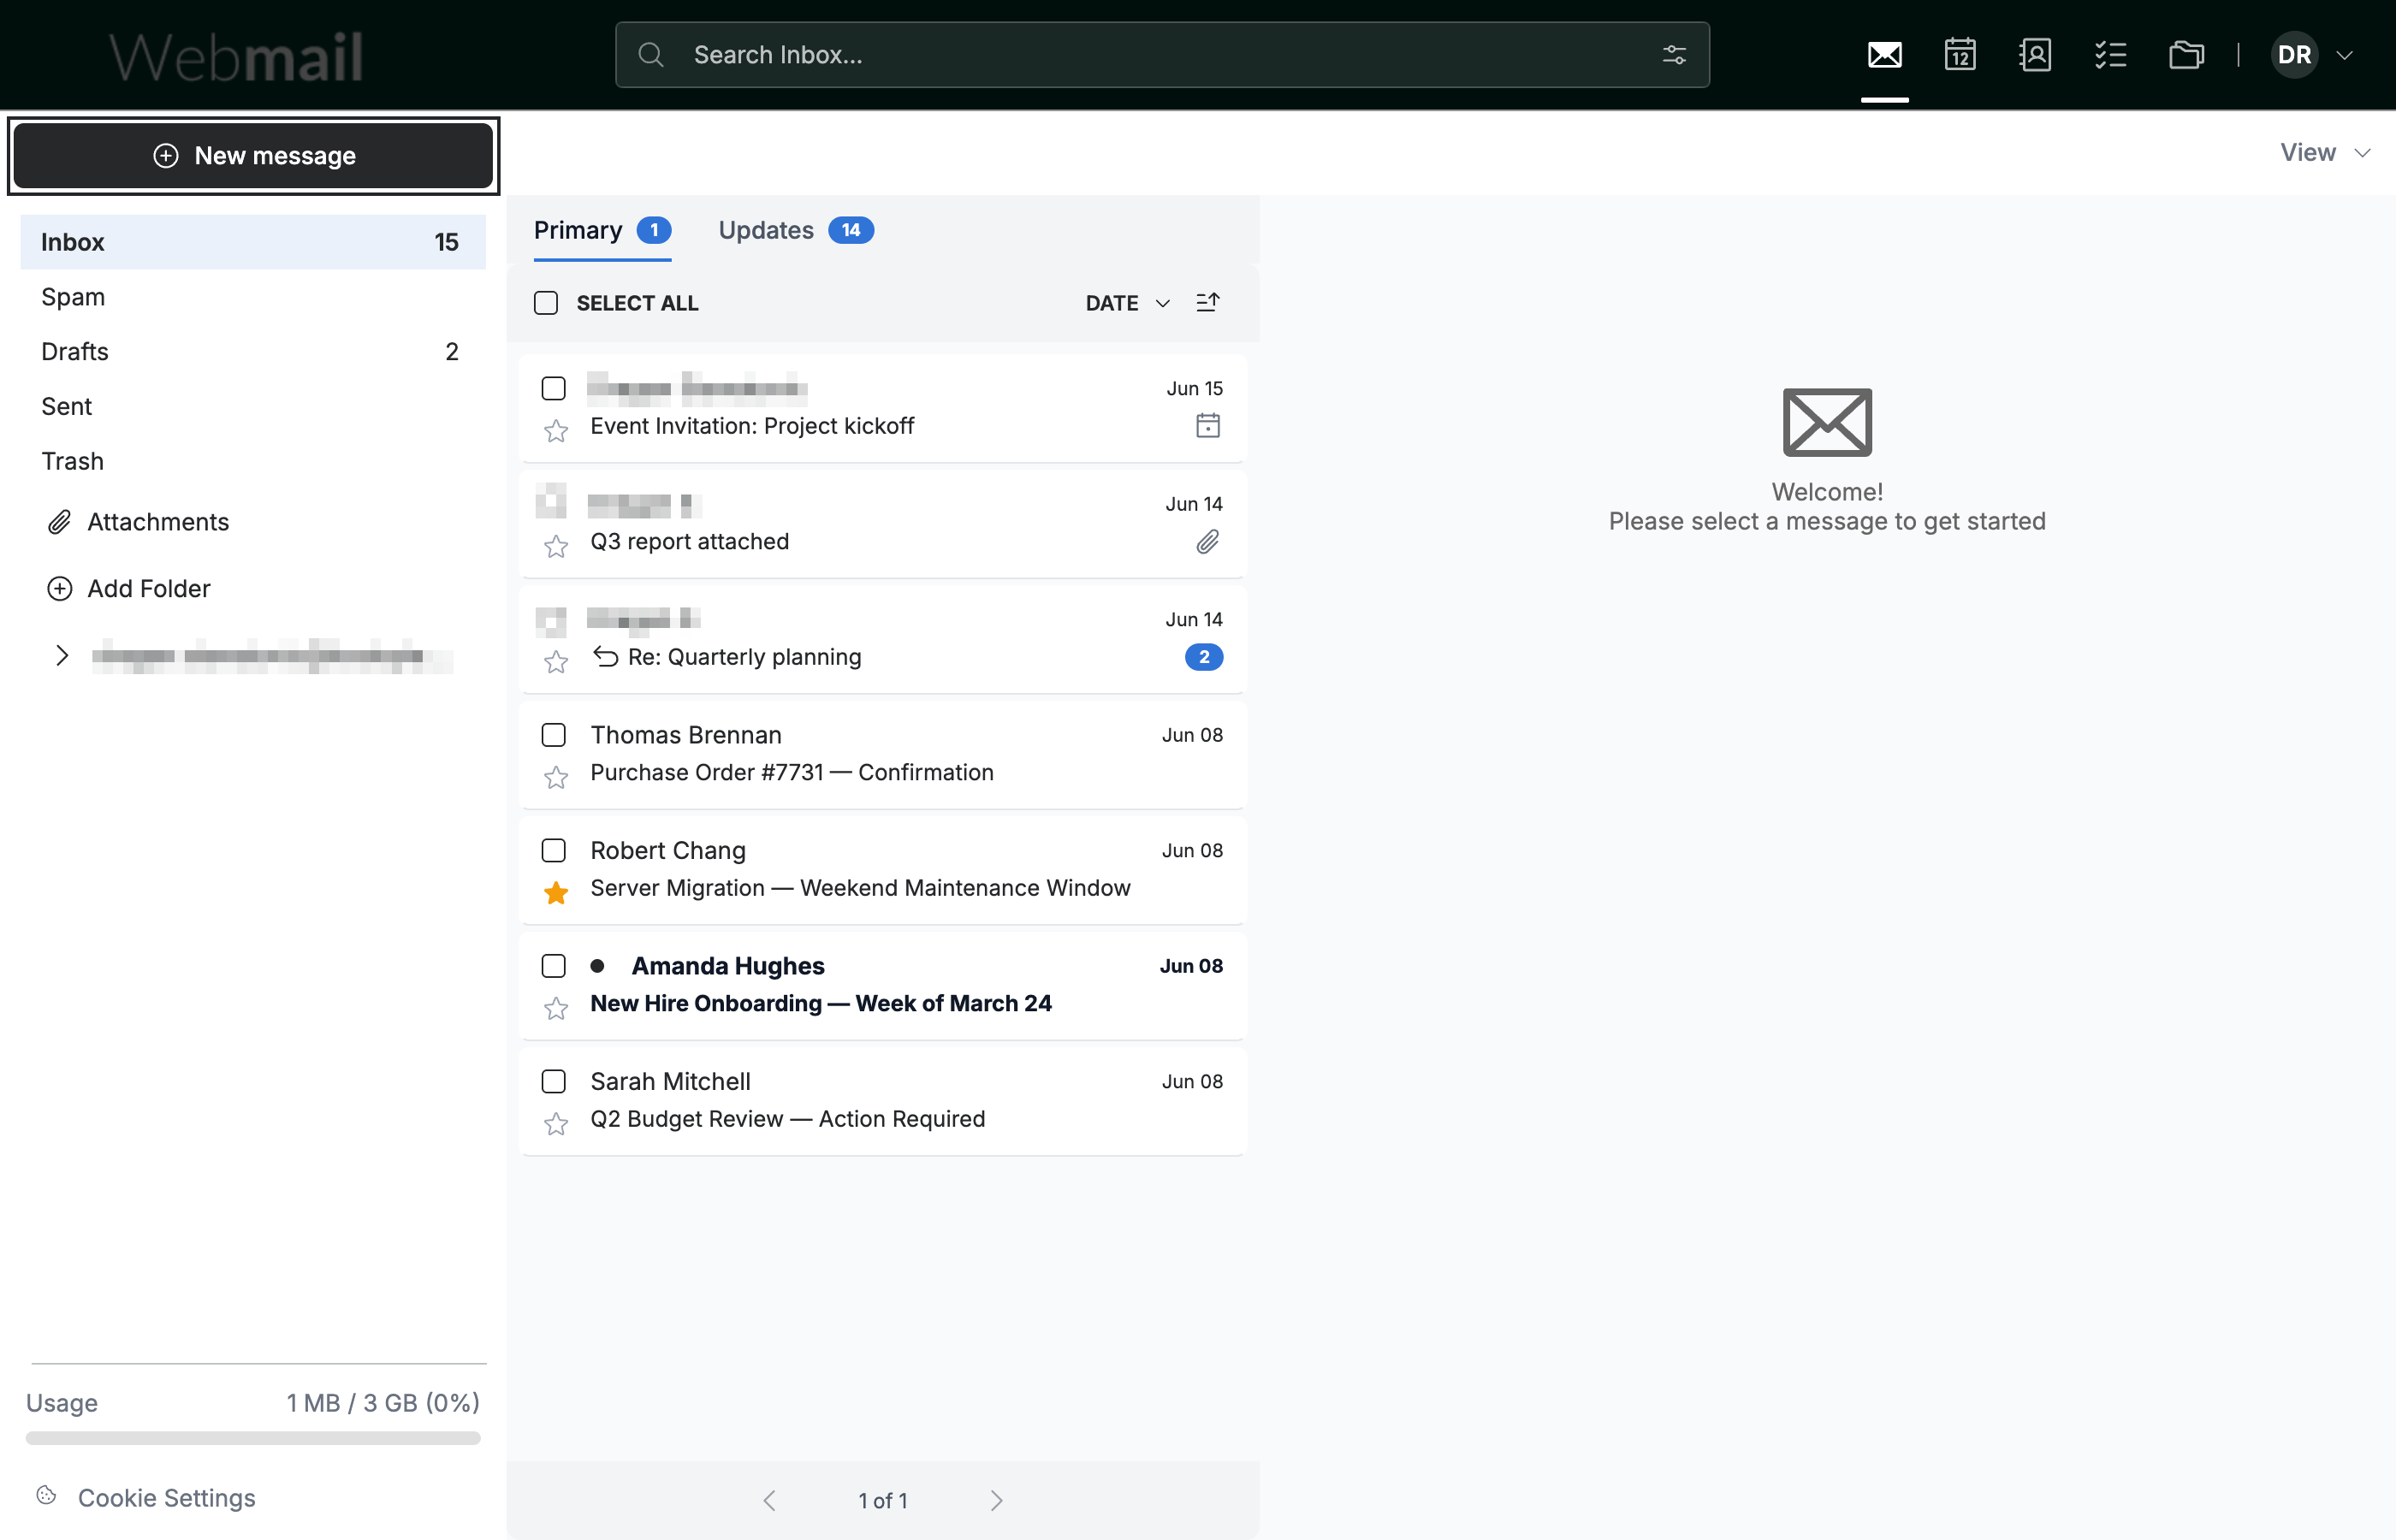
Step 1 — Click New message
Click New message in the sidebar to open the compose window and start a message.
Step 2 — Click Availability and choose a time range
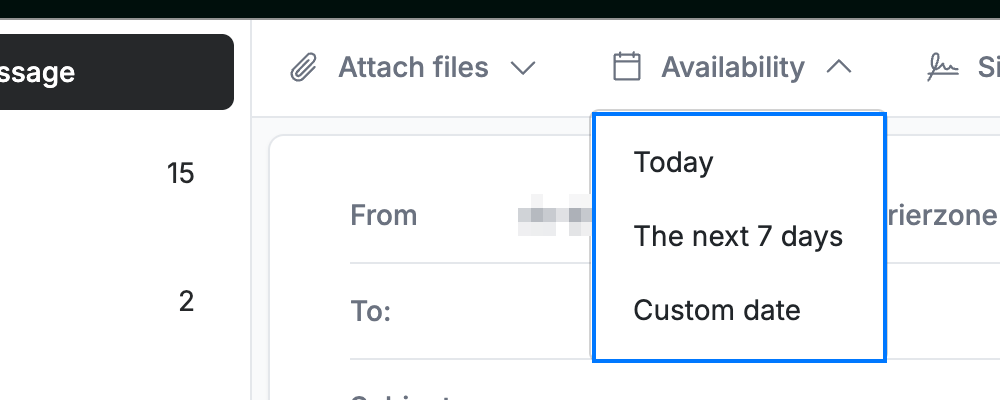
Click Availability in the action toolbar, then choose a range from the menu (blue): Today, The next 7 days, or Custom date.
Step 3 — Select the days to include
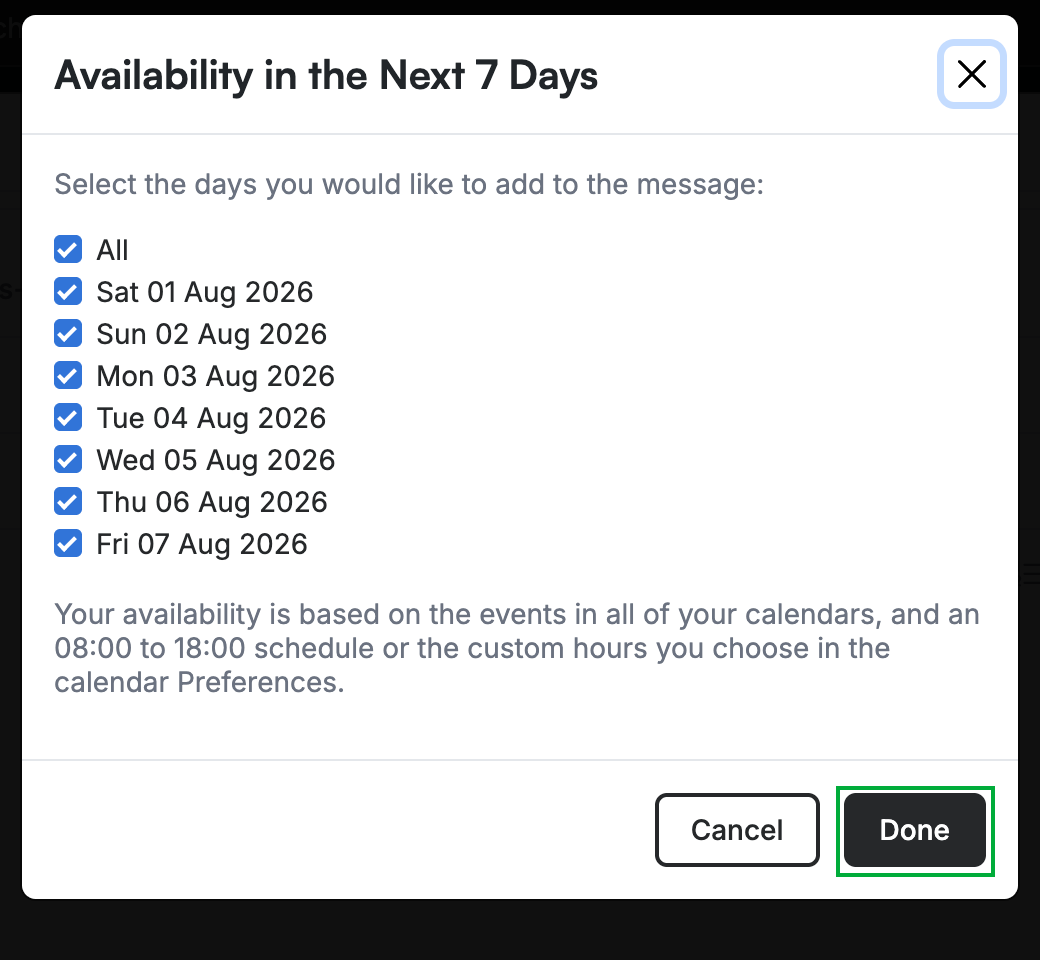
Select the days you want to share — clear any you want to leave out — then click Done.
Note: Your availability is based on the events in all of your calendars and an 08:00 to 18:00 schedule, or the custom hours set in the calendar Preferences.
Step 4 — Review the inserted availability
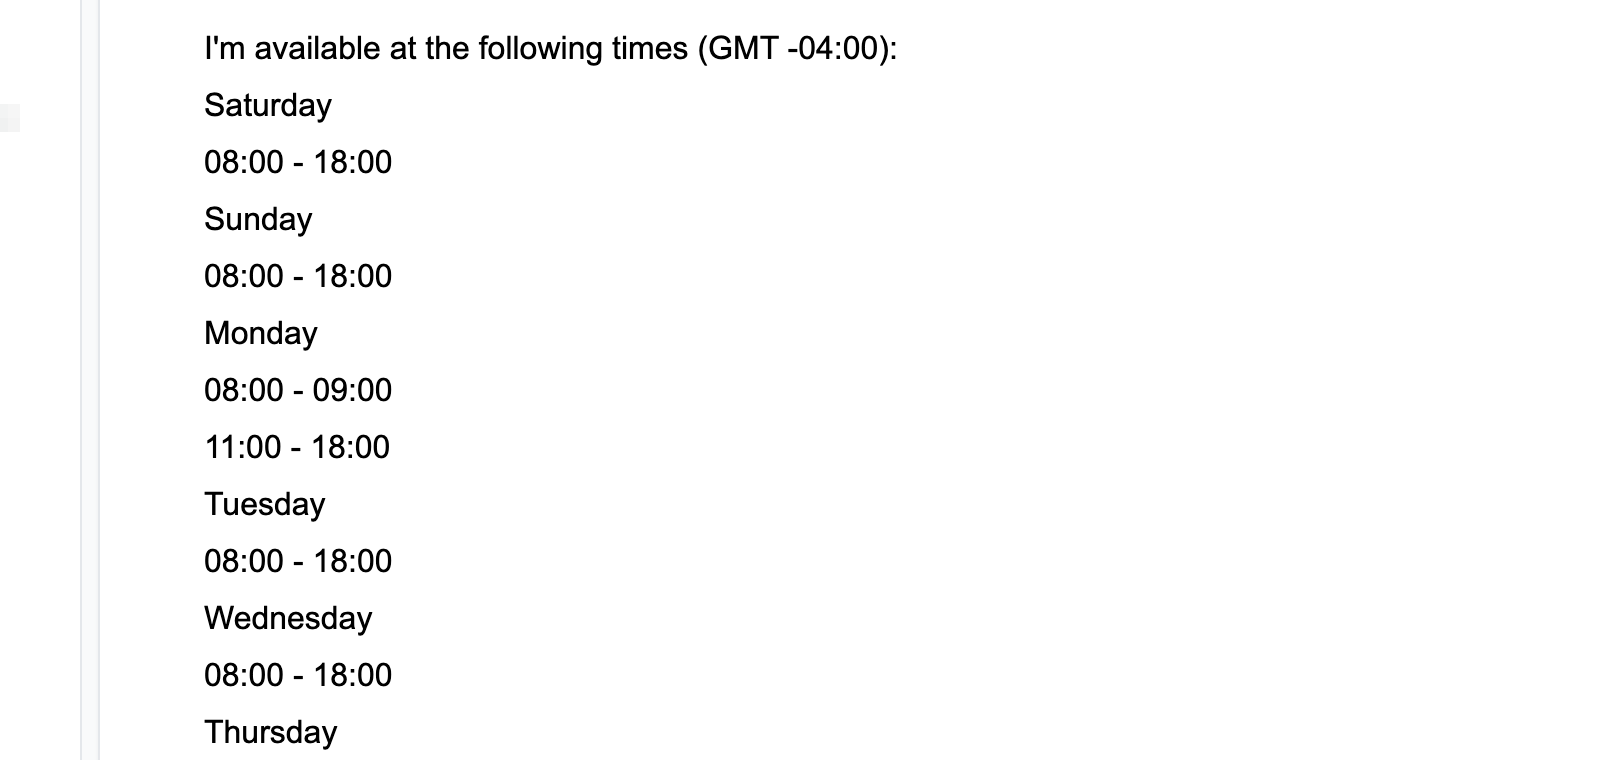
Review the free times added to the message body as text, grouped by day. Edit the message around them as needed before sending.
Explore our other guides to get the most out of Webmail.