Add your Webmail account to the built-in Mail app on iPhone or iPad so you can read and send mail from your device. This guide uses IMAP, which keeps your mail in sync across all your devices.
Before you begin: The server names and ports below are an example — always use the values shown on your own POP/IMAP page. We recommend IMAP over POP so your mail stays in sync.
Step 1 — Find your server settings
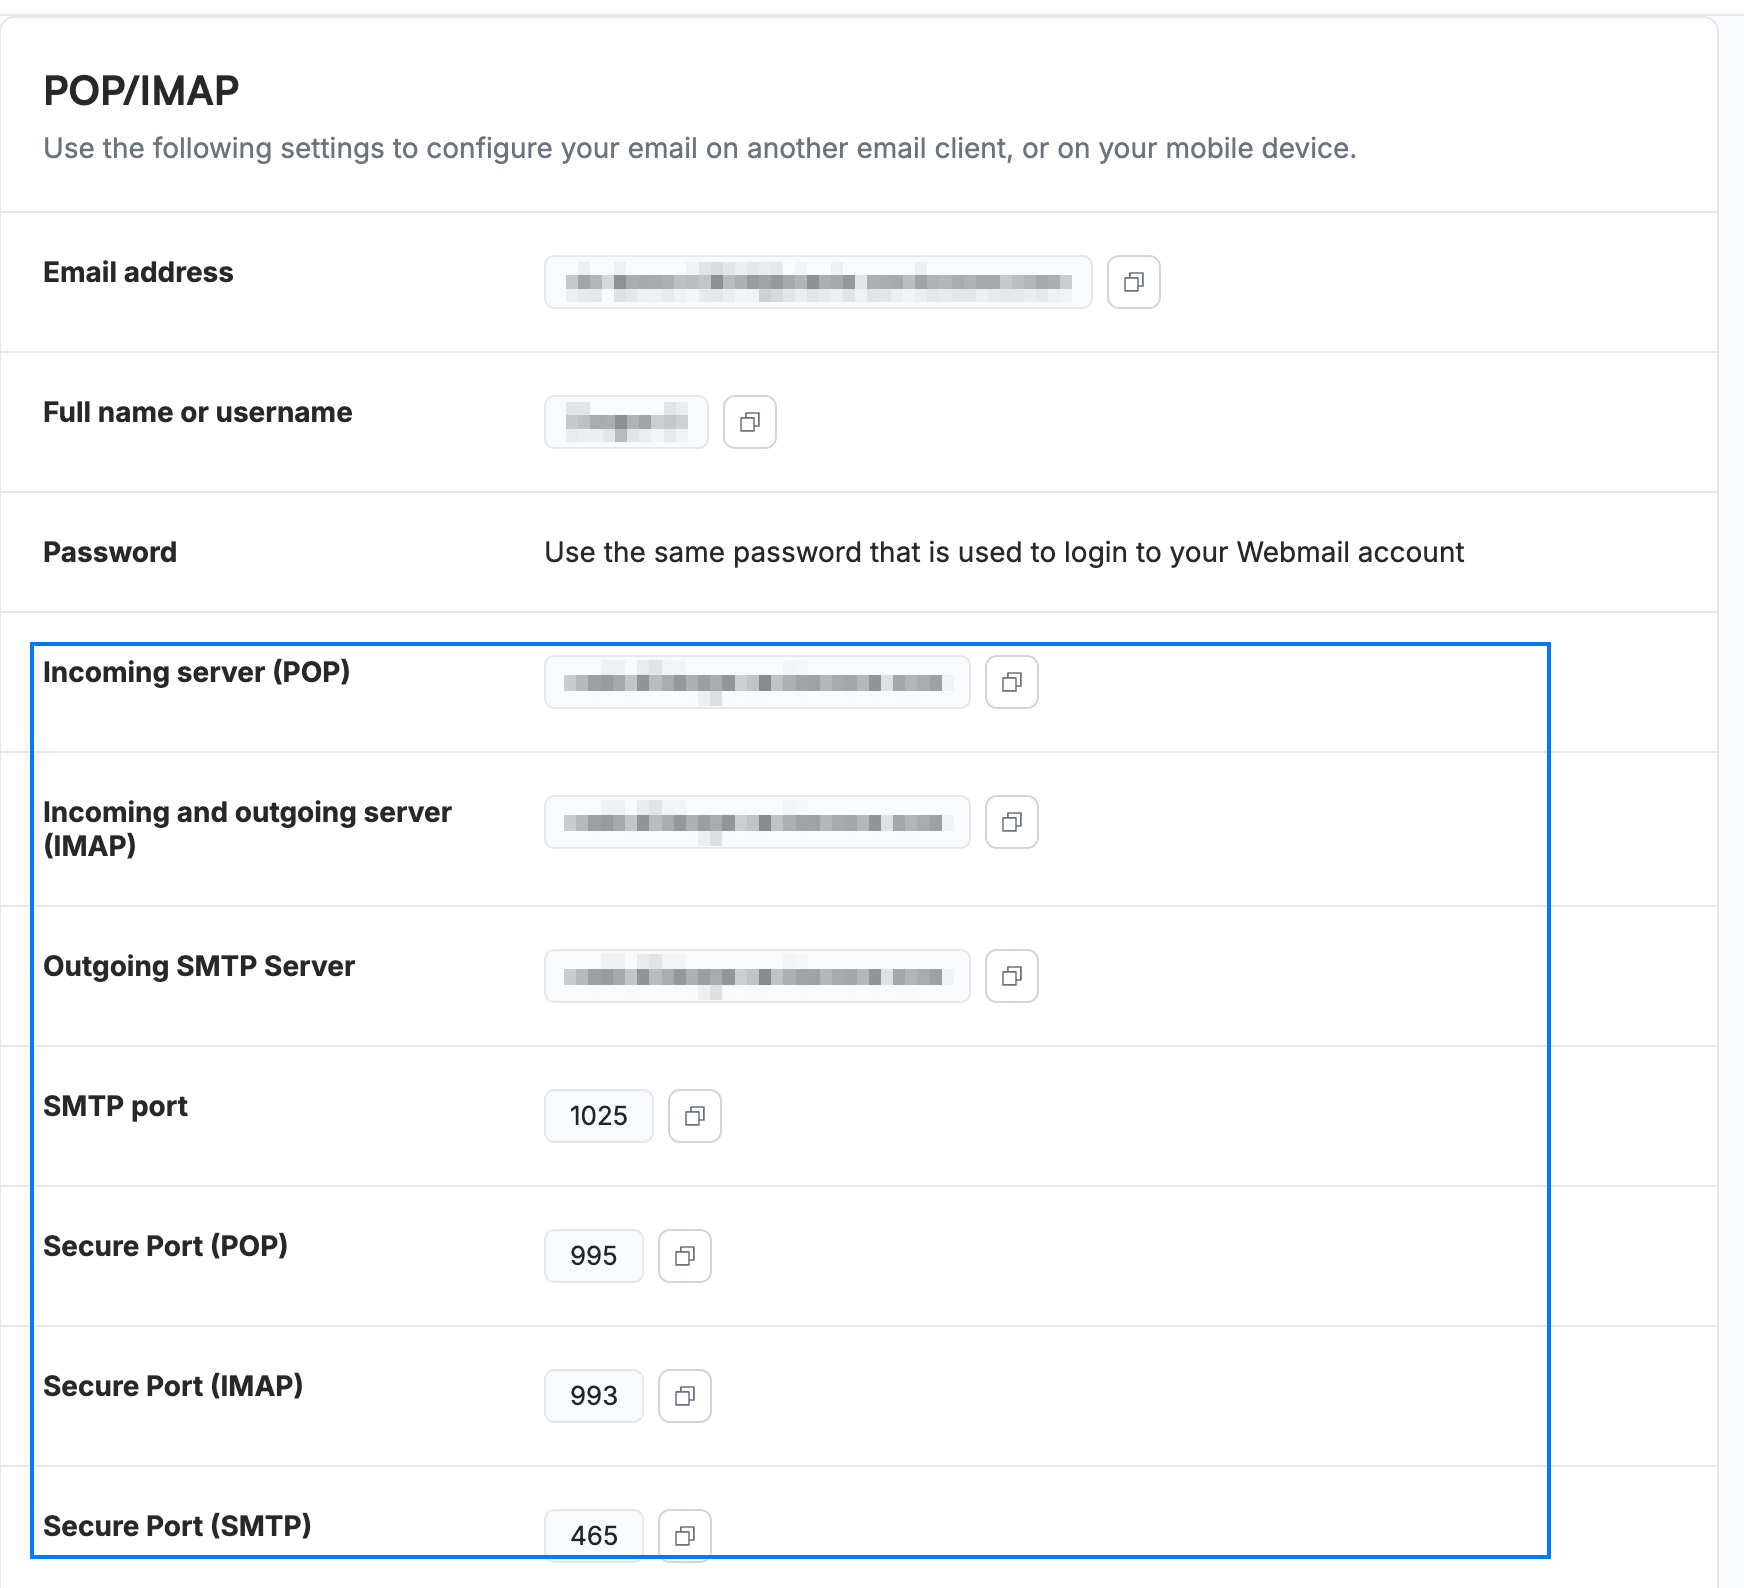
In Webmail, go to Settings > POP/IMAP. Note the server details (blue): your Incoming and outgoing server (IMAP), Outgoing SMTP Server, and the secure ports (IMAP 993, SMTP 465). Your password is the same one you use to sign in to Webmail.
Step 2 — Add a new account on your device
On your iPhone or iPad, open Settings > Mail > Accounts > Add Account, then select Other > Add Mail Account.
Step 3 — Enter your account details
Enter your name, your full Webmail email address, your password, and a description, then tap Next. Select IMAP at the top.
Step 4 — Enter the server settings
For both Incoming Mail Server and Outgoing Mail Server, enter your Webmail address as the username, your password, and the host name from Step 1. Tap Next, then Save.
Tip: If the connection fails, confirm the secure ports — 993 for incoming (IMAP) and 465 for outgoing (SMTP) — and that SSL is enabled.
Explore our other guides to get the most out of Webmail.