Learn how to use the formatting toolbar in Webmail to style your message text — change the font, apply bold or colour, add lists, and insert links and images — so your emails read clearly and look the way you want.
Step 1 — Find the formatting toolbar
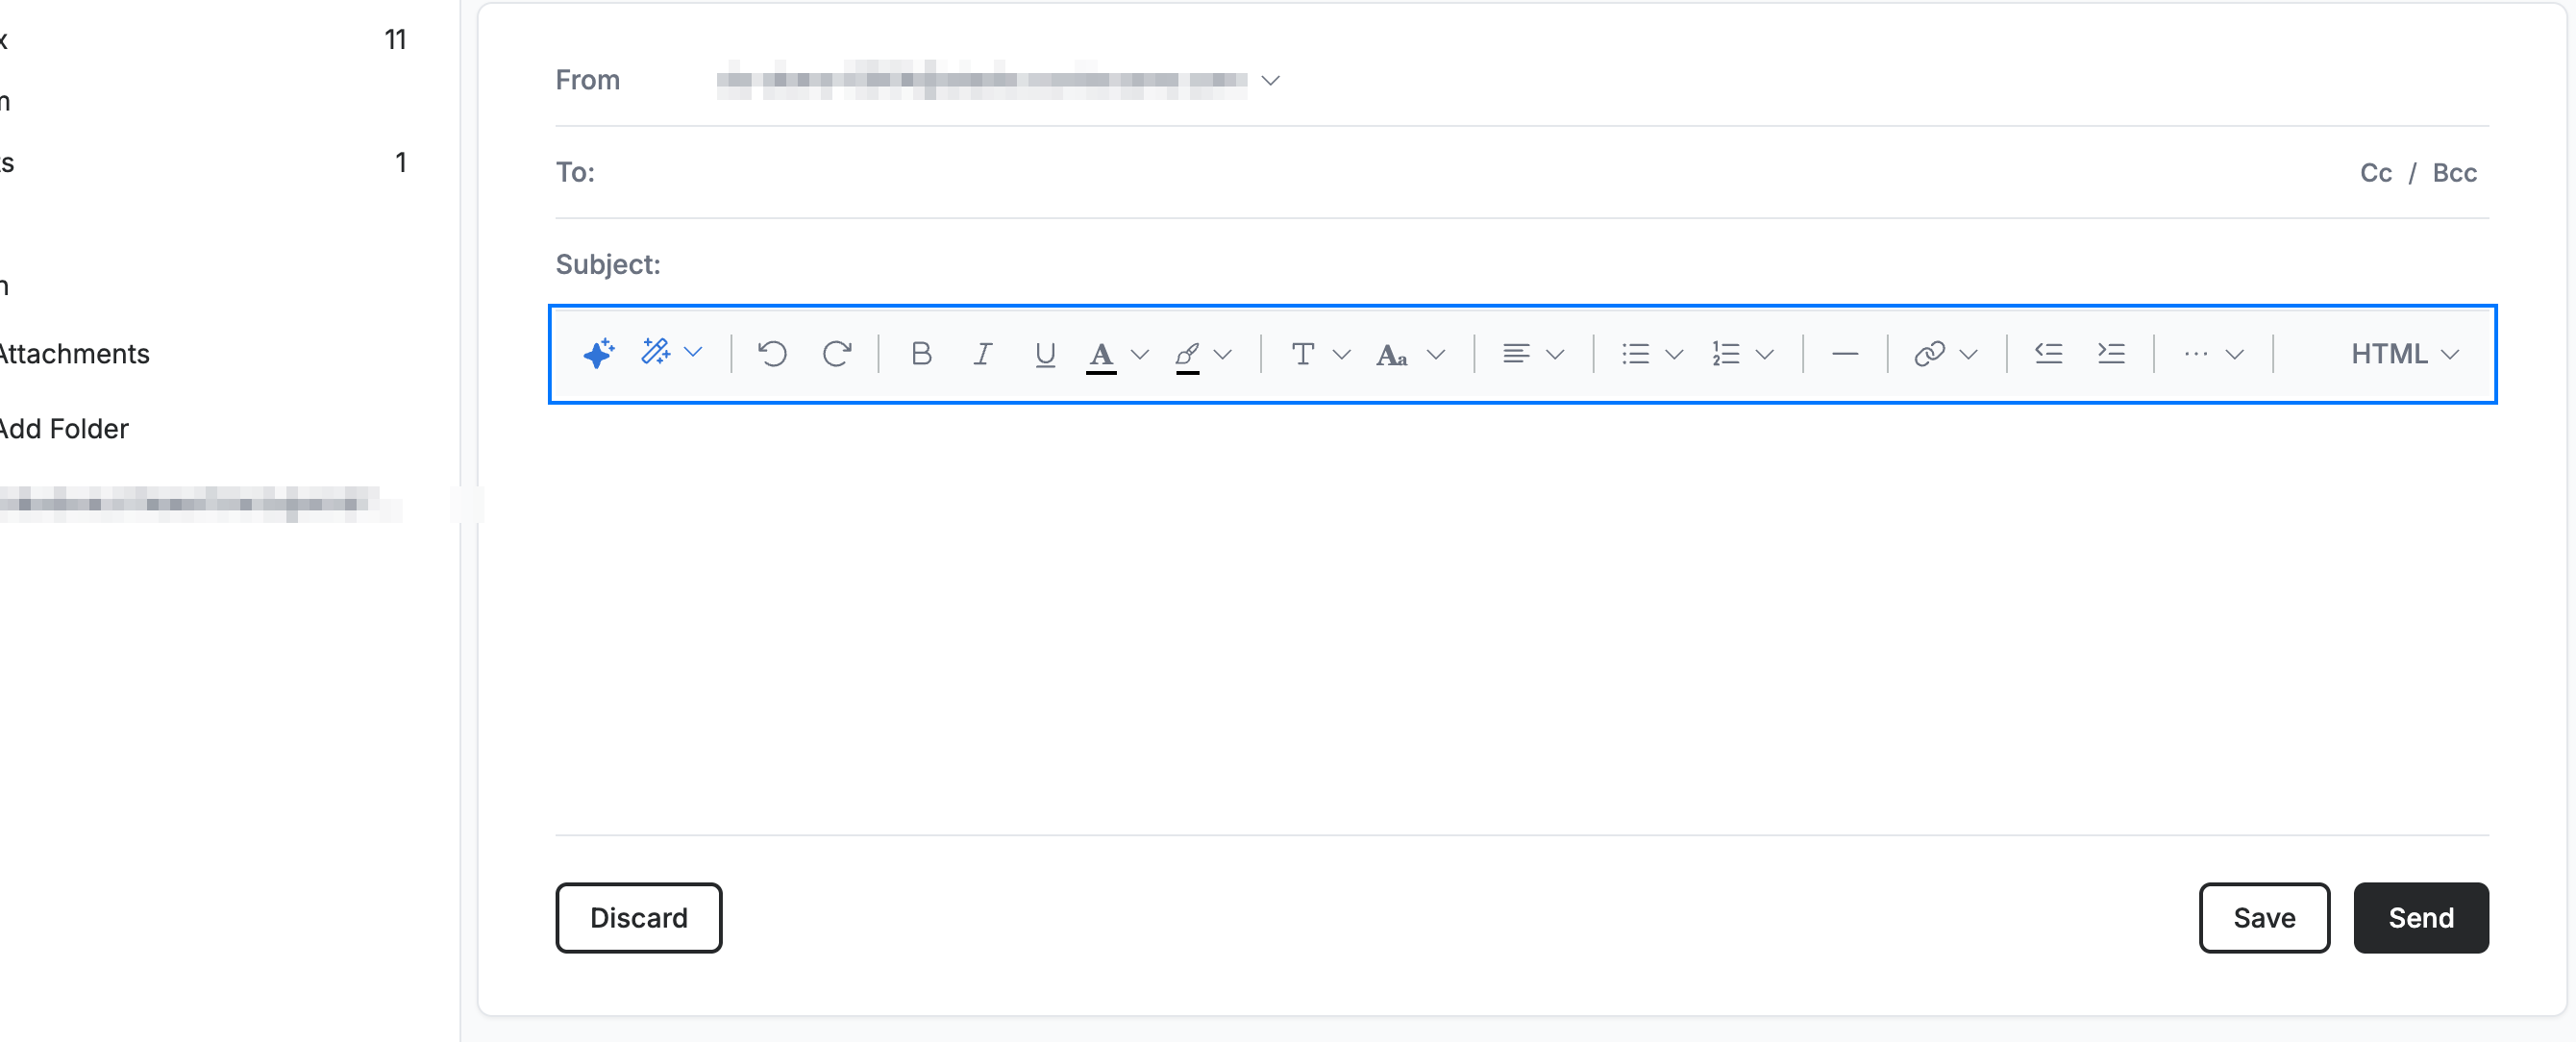
Locate the formatting toolbar directly above the message body in the compose window. It holds every text-styling tool covered in this guide.
Step 2 — Choose a font and size
Use the Font dropdown to pick a typeface (for example Arial, Georgia, Courier New, or Tahoma) and the Size dropdown to set the text size, from 8pt up to the largest option.

Step 3 — Apply bold, italic, or underline
Select some text, then click Bold, Italic, or Underline to style it.
Tip: Use the keyboard shortcuts Ctrl+B / Ctrl+I / Ctrl+U (⌘B / ⌘I / ⌘U on Mac) to apply these styles without leaving the keyboard.

Step 4 — Change text and background colour
Click Text Color to change the colour of your text, or Background Color to highlight it. Each opens a palette of colour swatches to choose from.

Step 5 — Align text and add lists
Use Alignment to set text left, centred, right, or justified, and the Bullet list and Numbered list buttons to turn lines into a list.
Tip: The numbered list button offers several styles — standard numbers, lower- and upper-case letters (a., A.), and Roman numerals (i., I.).

Step 6 — Insert links, images, and structure
Click Horizontal Line (orange) to add a divider, or Insert Link (blue) to add a hyperlink. The remaining insert tools are grouped under ··· (green) — see Step 7.
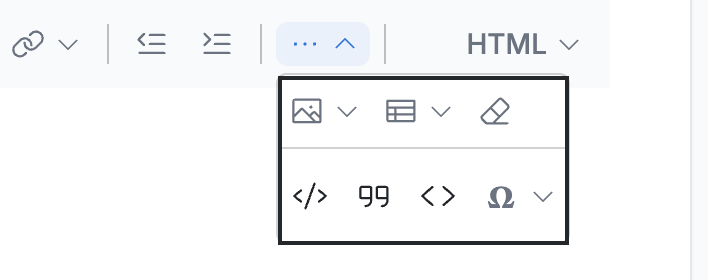
Note: On a wider browser window, Insert Image, Insert table, and Remove Formatting sit directly in the toolbar instead of under ···.

Step 7 — Open the More menu for structure tools
Click ··· at the right end of the toolbar to open the menu. It holds Insert Image, Insert table, and Remove Formatting on the top row, and Code Block, Quote, Inline Code, and Insert Special Character below.
Explore our other guides to get the most out of Webmail.