1. On the Contacts page, select More .
2. Select Import from the dropdown.
3. Use the dropdown menu to select an address book. This will be the one that your contacts will be added to.
4. Choose a file format from the Format of File dropdown.
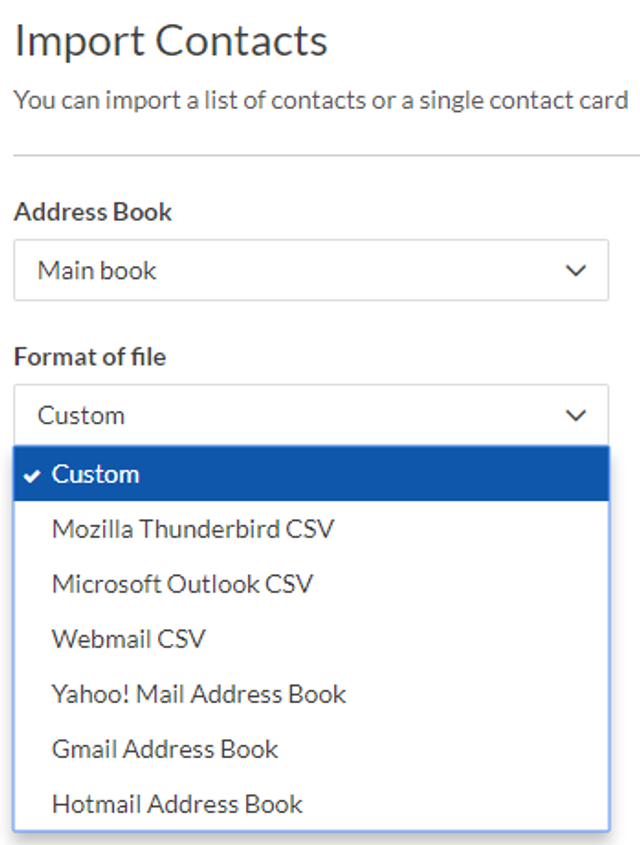
5. If you are not importing contacts from a CSV file that you exported from another email client, select Custom .
6. Choose the character set. In most cases, it will be Unicode (UTF-8) , but there are several other languages to choose from.
7. Click Upload to search for the file that you want to import. Note: When saving a contact list, make sure to save it as a CSV file. For more information on creating a CSV file, click here .
8. Select Next .
9. Verify the information and select Next. Note: Fields are the columns in your CSV file such as first name, last name, email, etc.
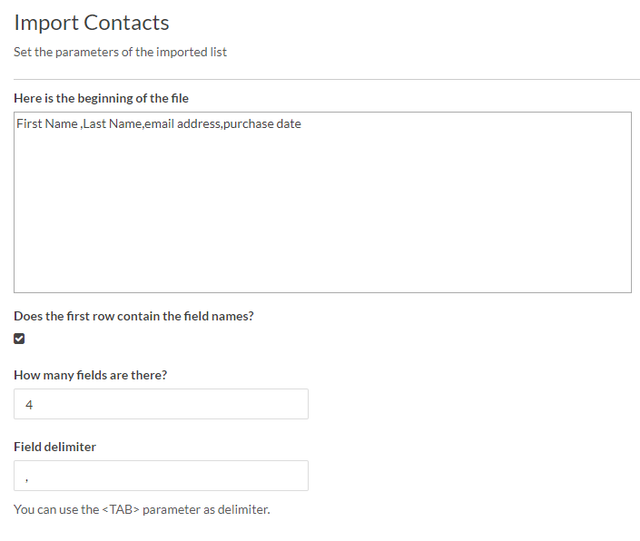
10. Next, you will map each field in your CSV file to the appropriate address book field. Make sure to accurately select the fields that match those in your CSV file.
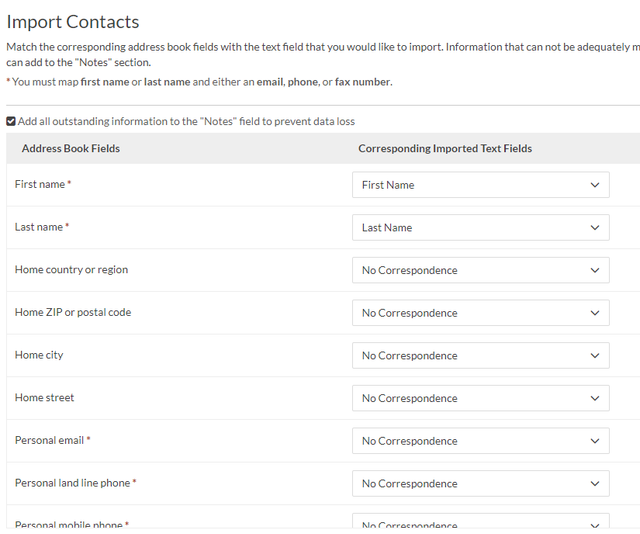
11. Finally, select Import . You will find your imported contacts in the address book you selected.