A table helps you lay out information in neat rows and columns inside your message. This guide shows how to insert one while composing an email.
Step 1 — Open the table tool
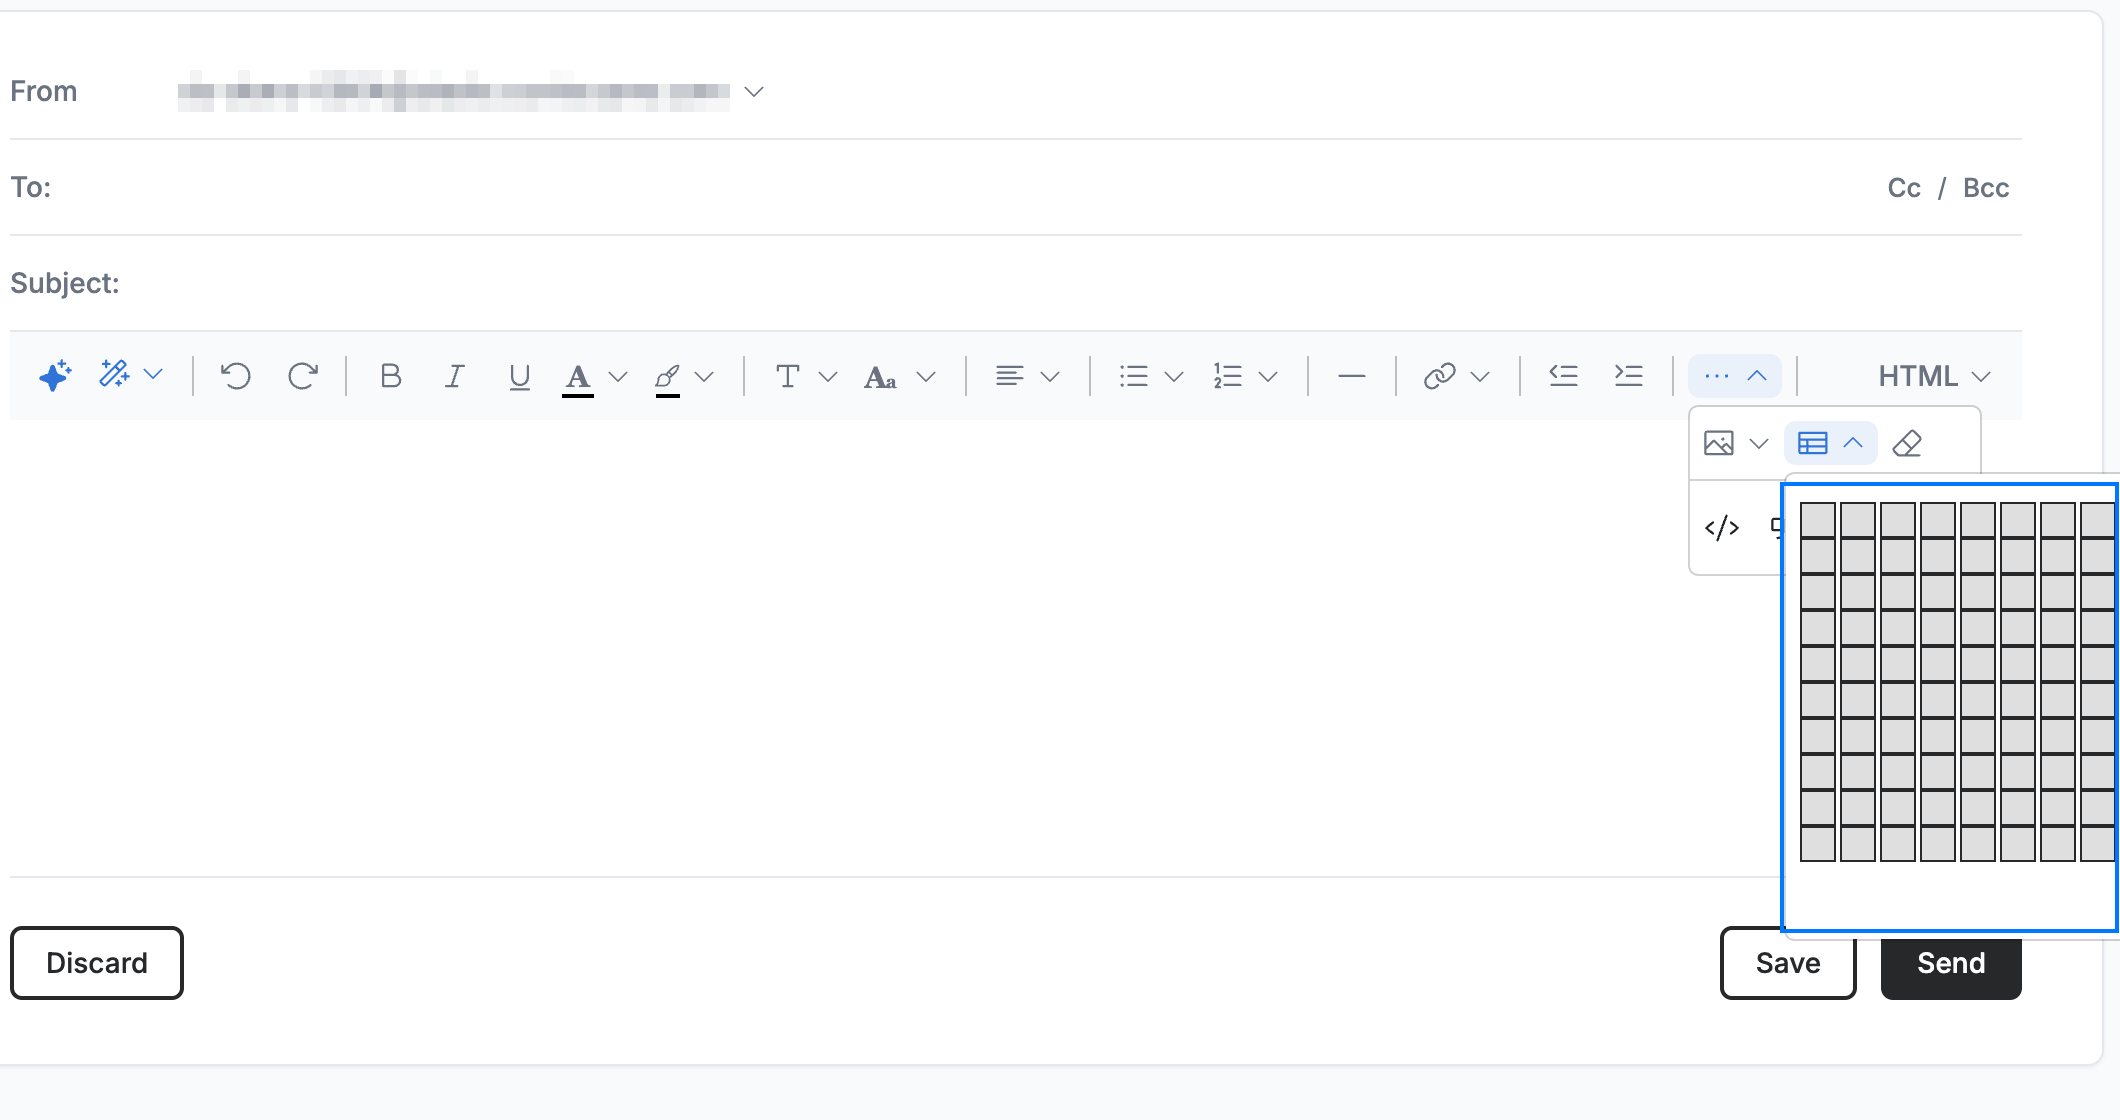
Click ··· at the right end of the compose window's formatting toolbar, then click Insert table (blue). A size grid opens beside it.
Note: On a wider browser window the Insert table button sits directly in the formatting toolbar instead of under ···.

Step 2 — Choose the table size
Select the table size on the grid (blue) — move your pointer across it to set the number of rows and columns, up to 10 × 10, then click to insert. The cells highlight as you move to preview the dimensions.
Step 3 — Fill in your table
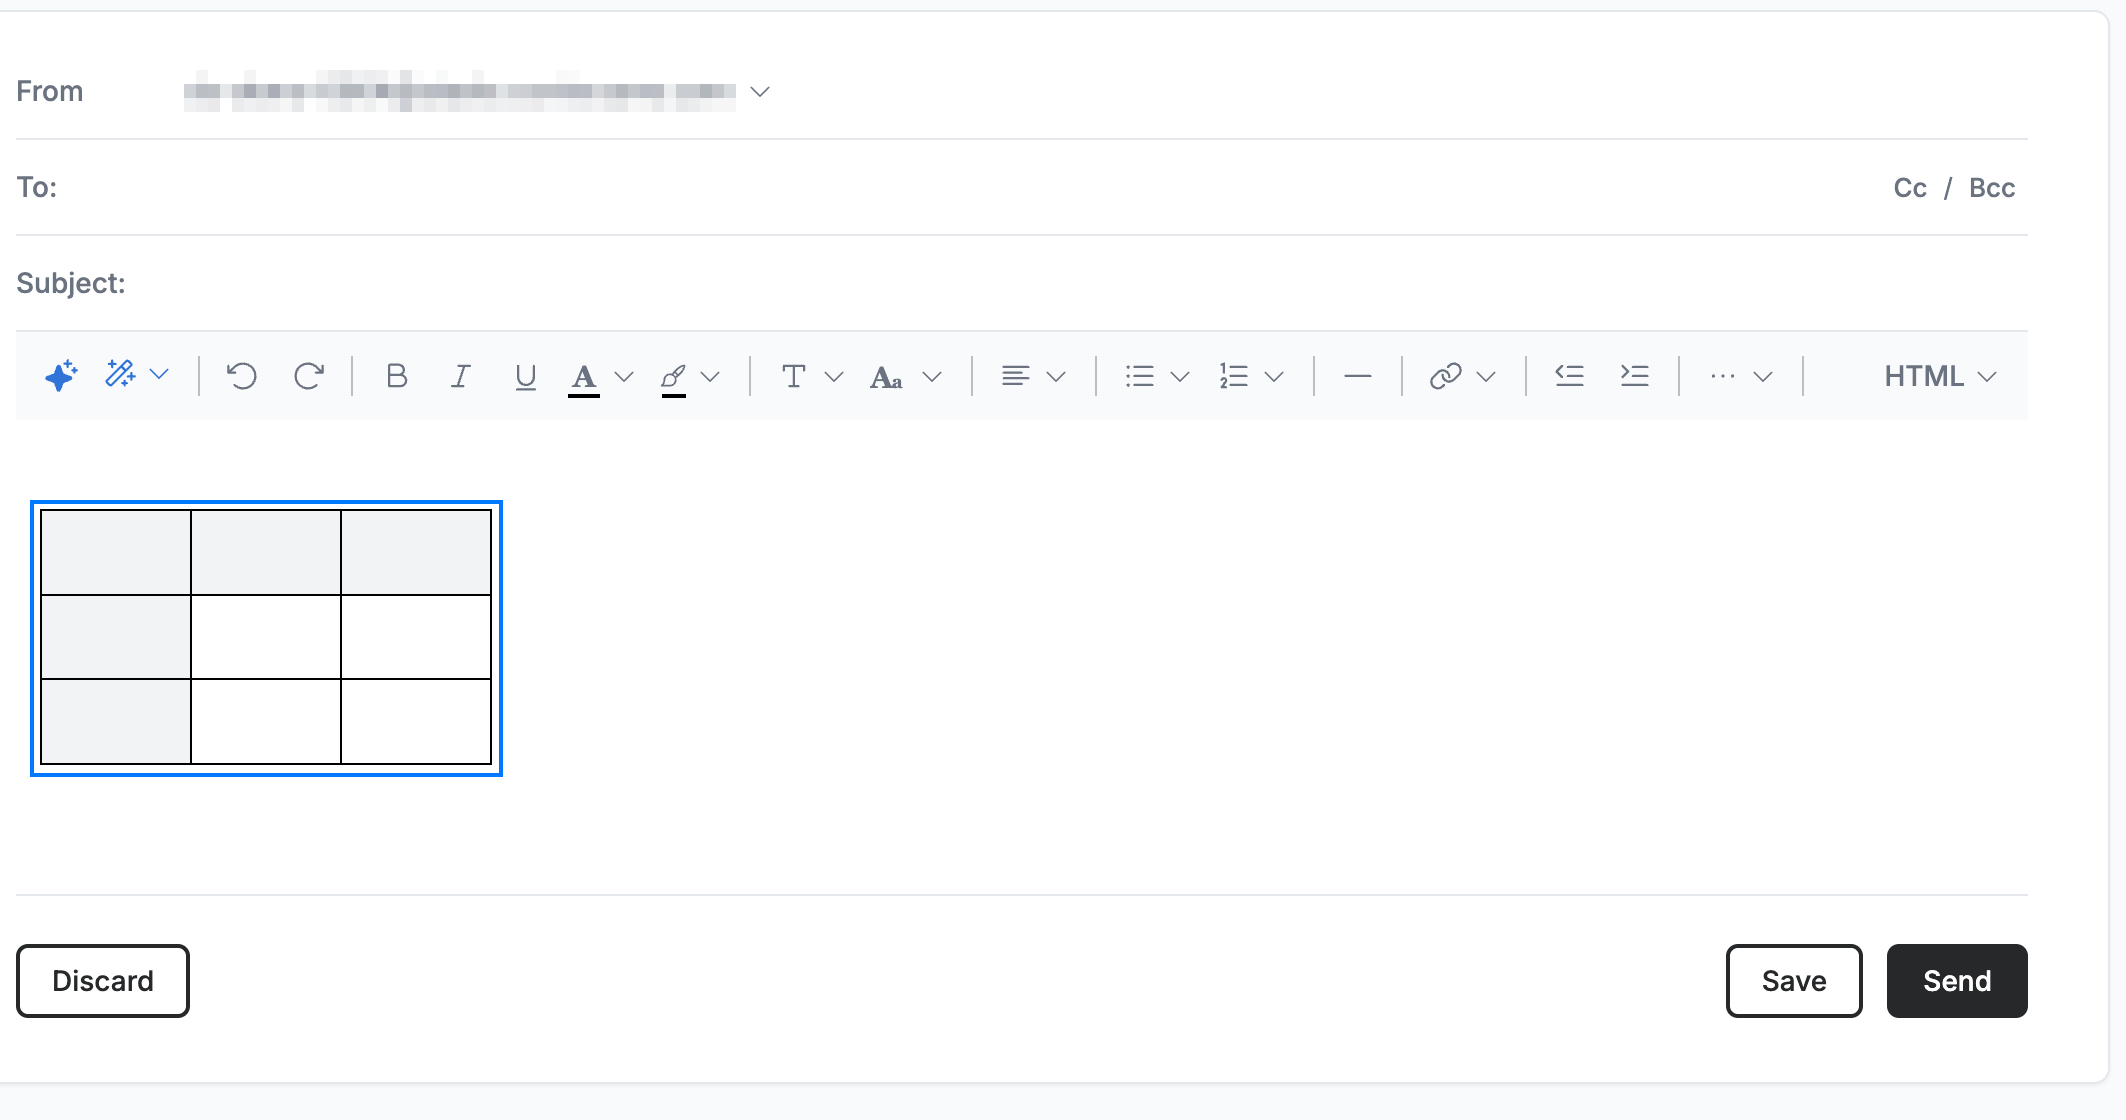
Review the table in the message body (blue). Click any cell to type in it, and use Tab to move to the next cell.
Tip: The first row and column are styled as headers — use them to label what each row and column contains.
Explore our other guides to get the most out of Webmail.